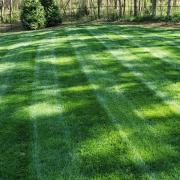
Starting a new Bluegrass lawn from scratch is not an overwhelming project. But then again, it is not a one-weekend project either. Try to spread the various steps over the next two or three weekends. For instance, I would strongly suggest cultivating one weekend and planting the next. This is especially true if you are cultivating areas under trees. The best news is that Bluegrass lawns are planted in cooler weather, so you can be thankful you are not laying Bermuda Grass sod on the 95 degree Saturday afternoon in July.
Steps in Planting a New Lawn
Step 1: Spray existing weeds. The first step in planting a new Bluegrass lawn is to eliminate all weeds from the lawn area. Use a non selective weed control like Round-Up. Plan ahead since you will need to wait approximately two weeks (check product label) after sprayer before you seed.
Step 2: Establish the grade. This is probably more than most of us can afford. Still, it is one of the best ways to guarantee a beautiful lawn is to establish the proper grade before you begin. This may be more than most of us can afford, but consider it nonetheless. The proper slope has the potential to prevent both drought and poor drainage. It also makes mowing easier. In general, a 2-6% grade is optimal.
Step 3: Cultivate the soil as deeply as possible. The deeper you can cultivate the soil, the more quickly your lawn will establish and thrive. Remember to wait the allotted time after spraying your herbicide before cultivating. Begin by removing debris like dead weeds, leaves and rocks from the area. Next, cultivate the soil with a rear-tine roto-tiller. If you don't have a roto-tiller consider renting one from a tool rental store. Rototill the entire area lengthwise, then again crosswise. Try to work at least 4-6 inches of soil into a nice pulverized soil mix. If you prefer not to till, cultivate as much of the area as you can with a hoe, garden rake, or shovel. The deeper you work the soil the better. Once you have cultivated the soil you will want to water this area for approximately 1 month if time allows and wait for new weeds to sprout then spray those out before seeding.
Step 4: Amend the soil. Most soil will need to be amended with humus before you plant. In almost all cases it is cases, it is better to spend the time amending the current soil with humus rather than hauling in new topsoil. Humus is a general term for organic material that naturally occurs in the top layer of soil. Unfortunately, most lawn areas are graded during home construction and the top layer of soil is buries or removed. Adding humus will renovate these soils by improving drainage in clay soils and improving water retention in sandy soil.
Step 5: Lime and fertilizer: A lawn is a big investment and it does not hurt to have the soil pH determined by your county Extension Service. Fescue prefers a soil pH of 6-6.5 and your soil tests results will recommend the specific amount of lime to add if the pH needs to be raised. Many Southern soils are acidic and will need lime. Whenever possible, purchase lime in a pelletized form because it is much easier to distribute. After you apply lime, spread a complete lawn fertilizer that contains slow-release nitrogen. It is preferable to start with a 3-1-2 ratio fertilizer like 12-4-8. Apply at a rate of 1.5 pounds of actual nitrogen per 1000 square feet.
Step 6: Seeding. Plan on using approximately 4-5 pounds of Bluegrass seed per 1000 square feet. Seed may take 2-4 weeks to germinate, so be patient. Begin by raking the area to provide as smooth a soil surface as possible. I like to use a plastic leaf rake because it creates tiny furrows and ridges on the soil surface that capture the seed. Measure the amount of seed needed for the lawn into separate bucket or container (approximately of course). Try not to use more seed than the recommended rate == an overpopulation of grass seedlings will weaken individual plants, cause strange growth problems, and make your lawn more susceptible to insects and diseases. Seed can be sown by hand or with a broadcast spreader. When using a spreader, sow one half the seed lengthwise and one half crosswise to avoid any skips. Once sown, lightly rake the entire lawn with a leaf rake to slightly cover the seed with no more than .25 inches of soil. The newly seeded lawn can be covered with a layer of wheat straw to prevent washing and erosion while the seed is germinating. You will need about one bale of wheat straw per 1000 square feet if you choose this route. Do not use hay since it is full of weed seeds.
Step 7: Sodding: Before laying bluegrass sod, cultivate the soil as described in step 3. Do not skip this step! It is imperative that fescue sod roots grow deep into the soil before the next summer.
Unless you are planting a small lawn, it is almost always cheaper and more efficient to order pallets of sod from your local nursery to be delivered to your house. Do not expect Bluegrass sod to grow to fill empty areas of the lawn. Begin by measuring the entire new lawn area and ordering enough square footage of sod to completely cover every foot. Plan on laying the sod soon after it is delivered on pallets. If you won’t be planting for a day or two, unstuck the pallet and spread the blocks. Stacked sod will turn yellow quicker than other grasses.
Begin by raking the entire cultivated area to prepare as smooth a surface as possible. It is best for the soil to be moist at the time of sodding, but not wet. Begin at the top of the lawn and lay the sod lengthwise so that the long side of each piece of sod is running across, rather than down, a hill or rise. As, you place each piece of sod, work it tight against the surrounding pieces to prevent the edges from browning and ruts from forming. Sod is often cut on a slant so that the edges will overlap. Pound each block of sod with your palm to press it into the soil below to remove any air pockets. Stagger the second row of sod so that the perpendicular edges to not line up. The result should look like a brick wall, not a checkerboard. If you are placing sod along steep gradients, pin them in place with stakes or metal pins. Irrigate deeply once all the sod is placed.
Step 8: Irrigation before establishment: Whether you have seeded or sodded, it is essential to irrigate in the coming weeks. A newly seeded lawn should remain moist for about two weeks. Water lightly and frequently. If the soil surface is eroding or becomes soupy, skip a watering. If the soil surface dries rapidly, water more frequently. After two weeks, decrease the frequency but increase the amount of water you are applying. By 4-6 weeks your bluegrass will need about an inch of water a week whether by irrigation or rainfall.
Step 9: Mowing. Mow your newly seeded or sodded bluegrass lawn as soon as it reaches the recommended mowing height (see “mowing”). This is a hard pill to swallow. A newly seeded lawn looks so delicate that most people wait and mow when the grass blades are 6 inches tall and flopped over. Do not hesitate.
Step 10: Fertilizing during establishment: A fall-seeded bluegrass lawn may benefit from a light mid-winter application of soluble fertilizer. Use a 3-1-2 ratio fertilizer like 12-4-8 that does NOT contain slow release nitrogen. Apply at a rate of .5 pounds of actual nitrogen per 1000 square feet. If your new lawn is dark green and growing well, wait until late winter to begin the normal fertilizing schedule


