All Products


My Cart
Menu


- CLOVERS
-
COVER
CROPS - DEER
- FLOWERS
-
GRASS
Blue Grama Native Grass Seed Bluestem Seeds - Big Bluestem Seeds - Little Indian Grass Seeds Northeast Native Grass Seed MixBlue-Eyed Grass Seeds Blue Fescue Seeds Blue Hair Grass Seeds Bluestem Seeds - Big Bluestem Seeds - Little Brome Seeds - Mediterranean Carex Seeds (8) Cat Grass Seeds Cloud Grass Coix Seeds Corynephorus Seeds Hordeum Jubatum Seeds Indian Grass Seeds
-
GROUND
COVER - HERBS
-
WILD
FLOWERSAnnual Short Seeds Annual Sun Wild Flower Seed Mix Balcony Wild Flower Seed Beneficial Insectary Wild Flower Seed Mix Birds & Butterfly Wild Flower Seed Mix Deer Proof Wild Flower Seed Mix -
SOIL
DOCTOR


How does your garden grow
Finding the gardening style that is perfect for you

How Does Your Garden Grow?
Finding the Gardening Style that is Perfect for you
By Kimberly Bell
Cover design by Kimberly Bell.©2012 by Outsidepride.com, Inc.
All rights reserved. No part of this manual may be reproduced without written permission from the publisher. The information in this manual is true and complete to the best of our knowledge. All recommendations are made without guarantee on the part of the author or Outsidepride.com. The author and publisher disclaim any liability in connection with the use of this information. For additional information, please contact Outsidepride.com, Inc., 915 N Main, Independence, OR 97351
Table of Contents
Cottage Garden IdeasRock Garden Tips
Creating a Cutting Garden
Herb Gardening
A Xeriscape Garden
Native Plants for Wildlife
Container Gardening
Trough Garden
Nature’s Garden
Resources
Introduction
I was captivated by the garden as a young child; both my grandmother and great-grandmother had flower gardens that were filled with flowering shrubs, roses, bulbs of all kinds, perennials and annuals. The garden was a lovely place to play and let my imagination run wild. As Grandma worked, I went from flower to flower, studying them up close and personal. When I was not studying the flowers, I was down in the dirt studying the creeping, crawling worms and bugs that were equally as fascinating. Our time in the garden invariably ended with cutting flowers for a bouquet that Grandma would put on my bedside table. With memories like that, it is not surprising that I was captivated by the charms of the flower garden.
 When were you captivated? Or maybe instead of being totally captivated, you are intrigued and have an eagerness to learn and experiment. When you see the perfect flower garden in your mind’s eye, what characteristics does it have?
- Does it attract wildlife?
- Are there lots of flowers for cutting?
- Are there hard structures in the garden such as benches and picket fences?
- Maybe the only space available for growing is a patio or balcony in a rented apartment.
- Perhaps there are water restrictions and brutally hot summers.
- Our property is less than ideal with slopes and rocks.
Personally, I think there is a magical element found in all gardens. The garden calls us to enter in and experience; it invites us to look for the secrets within. So, open the gate, and let’s see what the garden has to offer!
Cottage Garden Ideas
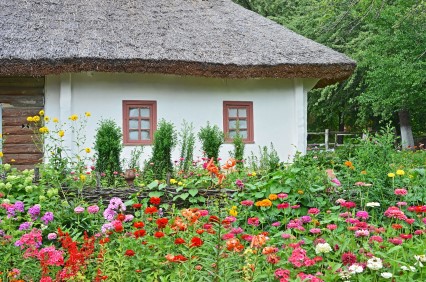 The cottage garden developed in England during the Tudor period (1485 to 1603). They were originally farmyard gardens, owned and grown by the housewife. The people were poor and needed to be thrifty in everything they did, including their land and what was grown. The plants that were grown were simple, hardy, and often passed along and shared with friends and neighbors. Plants of all kinds were grown: annuals, perennials, vegetables, herbs, vines, small shrubs, and small fruiting trees. Seeds were collected, kept and shared. Well-loved, treasured plants were tossed into a small patch of ground to survive and thrive. There was no design. Every plant that the housewife could find, scrounge or exchange was used, and it all grew unplanned into a glorious blaze of color and texture.
So, what can you take from the past and bring into your present day and your own gardening plans? You may not live in the humble cottage or have the need for growing all your own foods and medicinal herbs, but the natural charm of a cottage-style garden can be created by following a few simple basics.
Structure:
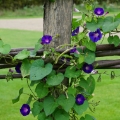
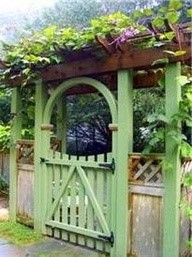
Often, there are structural elements that are lovely accents to the garden. An example would be an enclosure, such as a picket fence, to create a defined space. There is often an entry into the garden where a gate, arbor or trellis offers welcome. Vining plants create soft, natural enclosure as they ramble up and over fences and arbors. Once inside the garden, other structures might be a bench or other garden furniture, or a water feature, such as a fountain or pool. There may be an element of whimsy added with statues and garden art.
Walkways:
Cottage-style gardens are often small and intimate, so narrow walkways are acceptable. A wider path is more social and the narrow path more personal. For maintenance, wheelbarrows or carts may need to have easy access, so keep that in mind when planning the paths. Use a material for the path that blends in with the elements in the garden.
Beds:
The borders and beds in a cottage garden are often 3 feet, or more, wide and very curvy. In some parts, the border is narrower and at other parts it is deeper. This bed design brings intrigue as to what is behind the deeper areas. Because cottage gardens generally have a large variety of plants, it is important that the beds are well prepared with organic materials before planting. Composts can be tilled into the soil and spread around the base of plants after planting. Mulching is a great help in lowering maintenance and helping the variety of plants thrive.
Planting:
Although cottage-style gardens are free-flowing, they do need a certain amount of structure. Balance and harmony within a bed can be created with the shape of the blooms, colors, leaf size and texture. To achieve balance and harmony, choose 3 or 4 main colors. Variety can be achieved by using shades and tints of the main colors. Group flowers together without being symmetrical either in width or height. Single plants should be avoided unless they are larger specimen plants and are being used for balance or to create a focal point. Repeating a grouping of plants throughout the garden also helps to create unity and harmony.
Plant Selections:
Traditionally, the plants used in cottage gardens were easy to grow and thrived easily without a lot of care. The plants were shared, traded and passed along. If a plant is rare, difficult to propagate, or challenging to keep alive, it is probably not a good plant choice for this gardening style. Here are 5 plant suggestions:
- Annuals provide long-lasting color. Use annuals such as aster, zinnia, cosmos, baby’s breath, and poppy.
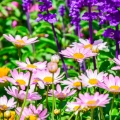
- Perennials provide long-lasting stability. Use perennials such as daisy, bee balm, hollyhock, delphinium, and dianthus.
- Shrubs provide a structural backbone. Evergreens add stability to the change in seasonal colors. Deciduous shrubs can provide fall color. Old-fashioned roses are wonderful cottage garden plants.
- Small trees that flower and produce fruit add height and seasonality to the garden. Small fruit trees don’t usually create a lot of shade and can be thinned if they do.
- Vines help soften the structural elements. Vines add vertical interest and help to create more of a sense of enclosure. Use vines such as clematis, morning glory, nasturtium, and black-eyed susan vine.
Rock Garden Tips
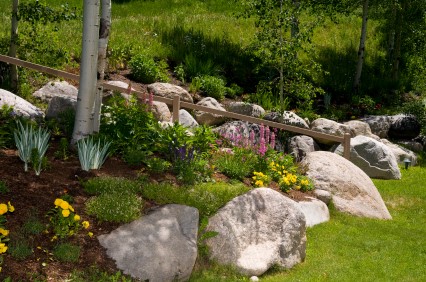 Rock gardening began in England in the 18th century as the naturalistic or landscape style replaced the formal garden style. People began to prefer the more natural look over clipped hedges and straight lines. By observing nature, English designers began to attempt the recreation of trickling brooks, wildflower meadows, and even small groupings of trees. For those that enjoy the mountains and rocky outcroppings, the designers attempted to create the rugged combination of stone and soft, low-growing flowering plants. These constructed “mountaintop” gardens were the first rock gardens.
Often the two gardening styles, rock garden and alpine garden, will be used together. Alpine gardens, by definition, use plants that are indigenous to high altitudes in mountain regions that are above 8000 feet. Alpine plants can withstand the harsh climate of mountaintops. However, it is possible to construct and enjoy rock gardens that are somewhat modified to fit any climate. For the purpose of this manual, our definition of a rock garden will simply be an area of plants arranged with rock that appears to be natural in origin. Here are some steps to consider when planning a rock garden:
Location:
The first step is choosing a location. The ideal site is sloping or uneven and in full sun to partial shade. Good drainage is a crucial requirement of the location, so if the site does not slope, make sure that it is an area where water does not collect, even during long rainy periods. Lastly, consider water availability. In the heat of summer, the plants will need additional water, so choose a site close to a water source.
After the site is chosen, look for ideas on how to create a natural looking rock layout in the chosen site. For inspiration, visit natural rocky areas or professionally designed rock gardens as well as looking at rock garden books.
Rocks:
If your site does not have the stones that are needed, select native rocks that will look most natural. Choose only one kind of rock, but select all sizes from large “two-man” rocks that form the back bone of the design down to small “fist size” rocks that will fit around the larger rocks to create planting pockets for the soil.
In most cases, it is best to have rocks in masses and not randomly “peppered” throughout the site. On a slope, the larger stones should be at the bottom, and the smaller stones on top to create the appearance that they have tumbled down into place. Place the rocks so that their grain is going in the same direction, and then bury each rock so that at least 1/3 of the stone is under the soil. To achieve a weathered look, try painting the rocks with yogurt to attract lichens.
Soil:
Drainage is the key to the survival of typical rock garden plants. The soil needs to be amended with lots of compost and rough builder’s sand so that it drains well. Some gardeners will even make a scree mixture with fine rock, organic matter and soil. Pockets of soil need to be formed deep enough to support plant roots. The pockets should be 12 – 18 inches deep.
Plant Selections:
Plants should be chosen that fit the scale of the rocks. Plants should neither grow too large and hide the rocks, nor should they be too small and be hidden among the rocks. Plants that have a clumping growth habit or a low creeping habit blend in well with rock garden designs. Unless a plant is quite showy, groups of 3, 5, 7, or more should be used rather than a single plant. Plantings arranged in irregular masses look more natural than blocks or straight lines. Here are some suggestions for plants that are suited to rock garden designs:
- Annuals: dahlberg daisy, moss rose, johnny jump-up, vinca, alyssum.
- Ornamental grasses: ruby grass, black mondo grass, blue fescue.
- Perennials: sedum, hens and chicks, rock rose, ice plant, blue clips campanula, armeria maritime, columbine.
- Consider a background planting of low shrubs and small trees to help counteract any impression that the area is constructed rather than natural.
Maintenance of a rock garden involves weeding and keeping unwanted grasses out, removing dead foliage and spent blooms, fertilizing each spring, and adding a ½ inch top dressing to replace soil that has washed away (use equal parts of compost/manure and coarse sand). A mulch of stone chips helps to discourage weeds and keeps the soil cool and moist.
The construction of a rock garden may be challenging and somewhat back-breaking, but the reward is a natural display that is visually attractive and provides a wonderful alternative for difficult property. The construction of a rock garden is a long-term benefit that will offer hours of enjoyment.
Creating a Cutting Garden
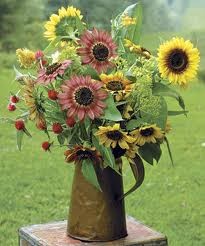 To cut or not to cut: One dilemma that I have had each summer is whether to cut my flowers for indoor use or leave the flowers in the garden for the lovely display.
I enjoy filling my house with fresh bouquets and giving flowers away to friends, but sometimes it is difficult to bring myself to cut the flowers. This has been a common dilemma that dates back through the generations. In the Victorian era, the simple solution to growing flowers for indoor use was to plant a cutting garden, and even to today, cutting gardens are very popular with many gardeners.
A cutting garden is made of annuals, perennials and bulbs that are especially good for cutting and lasting in the vase. The design of a cutting garden is very simple; you don’t have to be concerned about whether the flower colors complement each other or if the design is “correct.” This garden is to be filled with flowers and foliage that are your favorites for arranging.
Here are some basic steps to creating a cutting garden:
Location:
Pick a location that is sunny, receiving at least 6 hours of sun each day and that drains well. If possible, locate the garden within reach of a hose, as it will most likely need supplemental watering. The cutting garden can be an addition onto the vegetable garden, tucked away in a sunny corner, or blended in with the landscape. Work the soil and add compost before any planting takes place.
Choose the Design:
Design of the cutting garden usually follows two common methods:
- A row layout offers easy care and maintenance; allow for rows that will provide plenty of room to move about while you are planting, thinning, fertilizing, watering, etc.
- An artful layout offers an esthetically pleasing display with masses of flowers in groups that flow into one another and blend the cutting garden into the landscape.
Maintenance:
- Heavy blooming flowers need nutrition. Before planting, add a slow-release fertilizer to the soil. The slow-release fertilizer will provide consistent nutrients throughout the blooming season. During the heaviest blooming, use a liquid fertilizer application periodically.
- To help control weeds and for water retention, spread 2 inches, or so, of mulch around the young plants when they have reached several inches in height. The flowers will require about an inch of water each week.
- Regular cutting promotes flower production and keeps the flowers blooming throughout the summer. Deadheading spent flowers prevents them from forming seeds, which slows down the blooming. While regularly cutting, check for insect pests, such as aphids that may cause damage.
- When the blooming slows and the plants are finished, pull the plants, work the soil and replant with new seedlings. For example, a flower that provides early season color, such as pansy, can be replaced with zinnias that will perform until frost arrives in the fall.
The choices are nearly limitless, but as a rule, long-stemmed flowers are the best for cutting. Make sure that there are some foliage plants that will add texture and contrast to flower arrangements.
- Suggestions for annuals: ageratum, calendula, bachelor’s button, larkspur, dianthus (pinks), baby’s breath, sunflower, snapdragon, statice, sweet pea, stock, marigold, and zinnia.
- Suggestions for perennials: aster, bellflower, carnation, coneflower, coreopsis, blanket flower, heuchera, rose mallow, Japanese anemone, liatris, bee balm, peony, phlox, rose, rudbeckia, salvia, shasta daisy, veronica, and yarrow.
- Suggestions for foliage plants: artemisia (silver-leafed varieties), coleus, dusty miller, hostas, lamb’s ears, and lavender.
- Suggestions for bulbs: calla lilies, gladiolus, dahlias, tulips, daffodils, hyacinths, and squill.
- Harvest flowers in the morning or late evening when temperatures are cool.
- Take a clean container of fresh tepid water (up to 100°F) out to the garden and immediately place the cut flower into the water to prevent wilting.
- Remove foliage that will remain under the water.
- Once inside, re-cut stems with a sharp instrument making the cuts underwater if possible.
- Keep cut flowers in water while arranging.
- Use clean containers that have been filled with preservative water -- floral preservatives can be purchased from a florist. A home substitute is Listerine mouth wash, using 1 ounce of Listerine per gallon of water.
- Clean vases after each use with soapy water and bleach to kill bacteria.
Herb Gardening
Over the centuries, many herbs were thought to have magical properties and their wide spread use dates back to ancient civilizations. Even in the history of the United States, herbs played an important role. Settlers brought herbs to America, and as the population of the country grew, herbs from many different nations were grown. Early herb gardens were essential as they were the major source for food seasoning. The need for home-grown herbs declined as stores became more accessible, but today herb gardening is making a popular comeback, and many gardeners are rediscovering the rewards of growing their own herbs.
Culinary herbs are, by far, the most useful to gardeners, and they have a wide range of uses in cooking. Culinary herbs include: sage, chives, thyme, savory, basil, and there are many more. Aromatic herbs have pleasant smelling flowers or foliage and are often dried, as they will retain their scent. Herbs in this classification include: mint, marjoram, lovage and rosemary. Ornamental herbs offer lovely flowers and foliage that are attractive in the garden. Ornamental herbs would include: thyme, lavender and chives. Medicinal herbs are not as common to grow, as there is considerable knowledge and care in consuming herbs for healing. Examples of common medicinal herbs would include: St. John’s Wort, Echinacea, and Valerian.
An herb garden can be a part of the vegetable garden, or it can be separate and close to the kitchen where the herbs can easily be harvested and used in cooking. Many herbs are so lovely and long-blooming that they are great additions to any landscape. When planning an herb garden, here are a few tips and suggestions:
Location:
Select a good site for the garden; herbs will not grow in wet soil, so select a site that drains well. If the garden area drains poorly, consider raised beds and amending the soil with compost or peat moss to help lighten it. The site also needs good sun exposure; a minimum of 6 hours of sunlight each day is needed.
Size:
Determine the size of the garden; a typical kitchen herb garden can be 20 feet x 4 feet, but the size is up to the individual gardener and how much time he or she wants to invest. Herb gardening can also be done in several containers.
Soil:
Herbs do not need very fertile soil. In general, high soil fertility will often produce lots of foliage but, it may be poor in flavor. Adding compost annually to the herb garden usually is enough to keep the fertility adequate.
Herb Selections:
Decide which herbs to grow. There are such a large number of herbs that it can be difficult to decide what to plant. Here are a few suggestions:
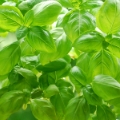
- For a kitchen garden, evaluate the herbs that you commonly use in cooking, such as thyme, sage, basil, chives and dill.
- For a scented garden, determine which scents are the most appealing to you and try growing mint, scented geranium, lemon balm, silver thyme and rosemary.
- For a single-color garden, chose the herb for its colorful flowers. An example would be to grow wormwood, horehound and lavender.
- Know whether the herb plants are annual, biennial or perennial.
- Annuals that bloom one season and die: basil, chervil, dill, summer savory.
- Biennials that live two seasons but bloom only the second season: caraway, parsley.
- Perennials that bloom each season and overwinter: chives, mint, thyme, winter savory.
Draw a diagram of the garden and label the plants. It is also helpful to keep a journal for herb gardening; record the types of herbs grown, when harvested, the age of the plants, etc. Herb plants often produce their best for several years and then need to be replaced. Record keeping is helpful.
Maintenance:
- Herbs are not usually susceptible to disease or pests, but it is still recommended to check the plants for pests. Be very careful with any pesticide product that is used, as herbs are consumed. Make sure the product can be used on herbs.
- Keep the herb garden clean: remove dead debris, deadhead and mulch to help suppress weeds.
- Perennial and biennial herbs may require protection during the winter; mulch the base of the plant in late fall, and do not remove the mulch in the spring until the plant shows signs of growth. Frost tender perennials, such as rosemary and pineapple sage, can also be grown in containers for bringing in each winter.
Some herbs, such as mints, are known to spread. Contain these plants by sinking a bucket (with holes punched into the bottom for draining) into the ground and growing the plant inside the bucket. The plant will grow well, and it will be productive and will be contained for several years. Annuals that easily seed, such as garlic chives, can simply be deadheaded to prevent rampant re-seeding.
Propagation:
Nearly all herbs can be grown from seed. Sow herb seeds indoors in late winter, and transplant herb seedlings outdoors in the spring. Some herbs such as anise, coriander, dill and fennel do not transplant well, so plant them directly in the garden. Herbs can also be propagated by cutting and division.
Harvest: Harvest and dry herbs when they have the best flavor, which is usually just before flowering. Cut the herbs early in the morning, wash them lightly in cold running water, and drain on toweling. There are several methods for drying and freezing that can be used for preserving.
Herb gardening is very rewarding, and herbs as a group are relatively easy to grow. Growing a diverse group of herbs can be extremely attractive. They can provide color, fragrance, and interest throughout the season, and as an added bonus, they can help keep pest problems to a minimum. Herb plants are very attractive to beneficial insects, and having a healthy population of the beneficials is good for the entire landscape.
Xeriscape Garden
 The word Xeriscaping actually means dry landscaping, and this style of gardening began to develop in the late 1970’s. At that time, a realization was made that throughout the western states nearly 50 percent of water use for an average homeowner was going to lawns and landscapes. Before tearing out a lawn or garden plantings that require frequent watering, here are some suggestions on how to best create a Xeriscape landscape.
Planning:
It does not matter if you are re-doing an old landscape or starting fresh with a new one, having a plan is the key.
- Assess the exposures on the site. Generally, south and west exposures have the greatest amount of water losses and this is especially true with an area that is next to a building or pavement. Often, a strategically placed tree can provide shade and help cool hot areas.
- Assess the slope of the site. Again, the slopes on the south and west exposures will experience the greatest amount of water run-off and evaporation. A drought tolerant ground cover planting can slow the water loss and help keep the soil cooler. Terracing a steep slope will help save water by slowing the run-off which allows more time for the water to soak in.
Evaluate the condition of the soil. Sandy soil loses water and nutrients through leaching, and clay soil loses water through runoff. A good soil supports plants and conserves water. For flower borders and gardens, adding organic matter each year will begin to create good soil.
Maintenance:
- For sprinkler systems that are already installed, check the overall coverage. Some places may be receiving water where it is not needed and other places may not be properly covered. Make the needed changes so that the sprinkler system is efficient. If a hose is being used for watering, water slowly and deeply at the base of plants.
- Use mulches to decrease soil temperature and reduce the amount of soil that is exposed to wind. Mulches also help to suppress weed growth and can improve soil conditions. Organic mulches, such as wood chips or compost, break down over time and amend the soil.
Select heat resistant and drought tolerant plants.
- Trees and shrubs that are suited to xeriscaping: juniper, potentilla, butterfly bush, Japanese barberry, ponderosa pine, and boxelder to name just a few.
- Garden flowers for use include: gaillardia, gazania, black-eyed susan, yarrow, red valerian/jupiter’s beard, lanceleaf coreopsis, gayfeather and purple coneflower.
- Ornamental grasses and native grasses are often drought tolerant. Use varieties like fountain grass, indian grass, little bluestem, maiden grasses, and plume grass.
- Ground cover plants that are often used for xeriscaping: pussytoes, woolly yarrow, snow-in-summer, iceplant, mock strawberry, and sedum acre.
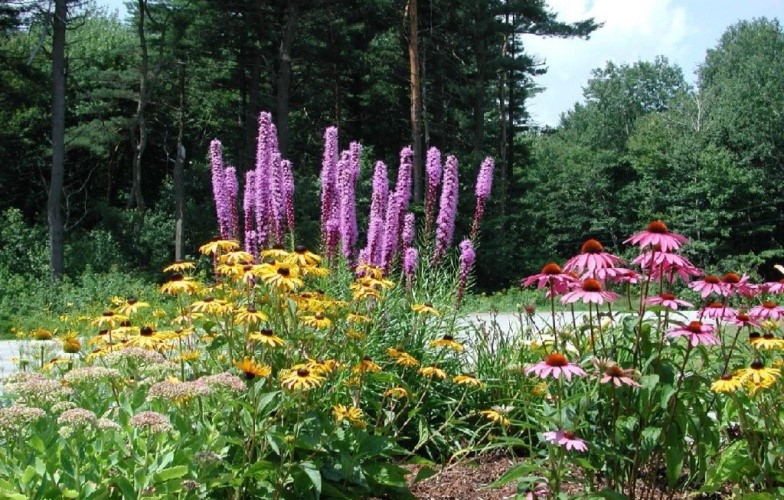
Native Plants for Wildlife
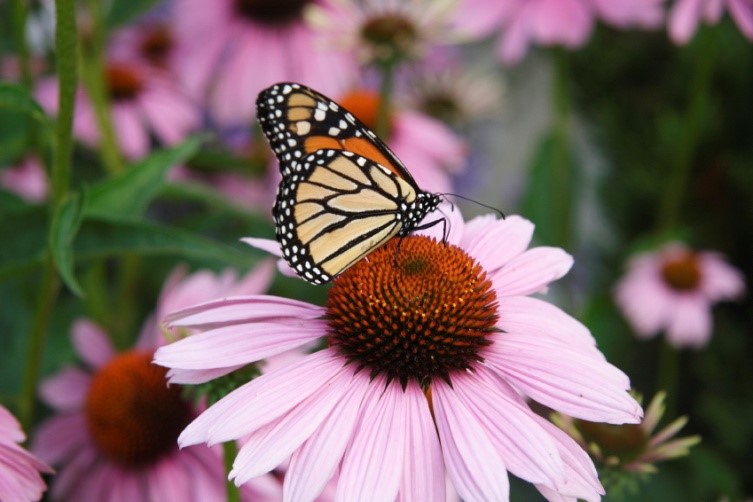 So what is a native plant? Native plants are the trees, shrubs, flowering perennials, ornamental grasses, sedges, ferns, and vines that were in a given area before European settlers came. Native Americans did have an impact on the vegetation of a region but not like the Europeans did. Once the settlers moved into an area, exotic or non-native, species were introduced and land was converted to produce cultivated landscapes.
So why grow native plants? There are actually many advantages for the home gardener to grow native plants. To name a few of the advantages:
- Native plants are often easier to grow; they are well-adapted to the local soil and climate conditions.
- Native plants require less watering and fertilizing than non-native plants.
- Native plants are more resistant to diseases and pests.
- Native plants provide food and habitat for wildlife; blossoms, seeds, and fruit attract a wide variety of birds and butterflies.
- Native plants are beautiful! They can easily be incorporated into either a formal or informal landscape.
How do we implement a native plant landscape? Whether our landscape is already established or we are starting with an empty canvas, we need to develop a plan. If the landscape is already completed, going “native” can be done in small steps. Replacing one exotic tree or shrub each year with a native species is not nearly as daunting as tearing everything up and starting over. Here are some considerations for the implementation plan:
Research:
Research the native plants for your particular region. Many states have native plant societies that offer on-line information as well as classes and lists of nurseries that are knowledgeable about native plant species. Some of the more common native plants for North America are: butterfly weed, coreopsis, purple prairie clover, blanket flower, gayfeather, evening primrose, goldenrod, and black-eyed susan to name a few.
It is not recommended to remove native plants from the wild and transplant them into the garden. It is recommended to grow native plant species from seed or find native plant nurseries.
Soil:
As with any gardening project, prepare the soil. Taking the time to make the soil healthy will give years of sustainability.
Maintenance:
- Like all new plants, the first year of establishment will take the most effort. Plan on watering the young native plants regularly the first year.
- Spreading 2 – 4 inches of mulch around the base of plants helps to maintain moisture as well as suppress weed growth.
- Prune shrubs and trees during the winter; never prune during the nesting season which is typically mid-March through July.
- Do not deadhead all the blooming plants, but let the seeds be available to birds during the fall and winter.
- Avoid the use of pesticides that may be harmful to the wildlife.
Container Gardening
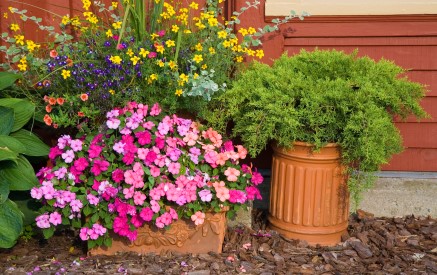 More and more people are learning about the benefits of gardening in a container. With an apartment balcony, courtyard, deck or front porch, it is possible to grow a wide variety of plants. Maybe a lack of space is not the problem, but a lack of time is. Maintaining a large landscape or garden takes time, and many gardeners find that growing a few containers of their favorite flowers, herbs, and vegetables is all that they have time for. Container gardening is a great option for limited spaces, for adding a decorative element to the existing landscape, for beginning gardeners, and for those who have little time. Many, many plants can be grown successfully in containers, but there are a few basic needs to be considered.
Containers:
There is a wide array of containers that can be used or made that are suitable for growing plants. Purchased containers can be made of wood, clay, metal, ceramic, fiber, or plastics. But common items around the home can also be used, like buckets, trash cans, crates, milk cartons, old boots or old bathtubs and the list could go on and on. If crates or wire baskets are being used, it is best to line them with sphagnum moss or coconut coir to help keep the soil in place. Whatever container is used, it must provide the following:
- Be large enough to support a fully grown plant – It is easy to underestimate the size of container that is needed. Herbs can often be grown in containers that are ½ gallon to a gallon in size. Vegetables usually require a container that is 3 – 5 gallons. Annual flowers that are less than 12 inches in height can grow in nearly any size container. A general rule for annuals and perennials is the taller the plant, the more root mass is produced, so a larger container is needed.
- Hold soil – A lightweight growing medium that is porous is the best. Do not use garden soil for containers, as it is usually too dense to offer the best aeration and drainage. An all-purpose potting mix that can be purchased is recommended. A mix of peat moss, vermiculate and/or perlite will remain loose, drain well, yet stay moist and hold nutrients.
- Drain adequately – Drainage is extremely important! The container must have holes on either the bottom or the sides. If the holes are on the bottom, the container should be slightly elevated so the excess water can freely drain out. Ideally, the holes are near the bottom of the container but located on the sides so the container can rest completely on the ground. If using a container that does not have drainage holes, use a growing container with bottom holes and a spacer. For a spacer, place a small brick in the bottom of the container without holes, and place the growing container inside the decorative container on top of the brick. The slight elevation will allow proper drainage. Take precautions during periods of heavy rain, and remove the growing pots, as the excess water can drown the plants.
In general, container gardens require a more frequent watering schedule than plantings that are in the garden or landscape. Allowing the containers to dry out completely may kill the fine plant roots. Depending on the temperatures and the location of the containers, watering can be daily to every couple of days. Check the containers daily for soil dryness.
Fertilizing:
Most commercial potting mixes are lower in nutrients, although some now have time-released fertilizer pellets. An option is to mix the growing mix with compost, 3 parts potting mix to 1 part compost, or to purchase the slow-release fertilizer pellets and add some to the soil. Water-soluble fertilizer applications are the most recommended way to provide nutrients to container plants. It is important to follow the package directions, as too much fertilizer can damage, and even kill plants.
Light:
Most vegetables, herbs and flowers need full sun for healthy growth and for producing a crop. Place containers where they will receive at least 6 hours of sunlight each day. Reflected sunlight can be damaging to plants. Light reflecting off of lightly colored buildings, paving, and western exposure may provide a risk of sun scald. Containers can be moved. If the plants are not thriving due to too little or too much light, find a new location.
Selecting plants:
There are many plants that are well-suited to being grown in a container. This list just includes a few suggestions:
- Herbs: thyme, oregano, rosemary, chives, basil, cilantro, lavender.
- Annuals: ornamental peppers, verbena, salvia, impatien, pentas, torenia.
- Herbaceous perennials and flowering perennials: hosta, ornamental grasses, gaura, penstemon.
- Vegetables: look for varieties that are labeled as “bush,” “patio,” or “dwarf.” Beets, carrots, cucumber, green onions, tomatoes, peppers.
- Shrubs and small trees: butterfly bush, Japanese maple, dwarf conifers.
- Vines: add a trellis or cage to the container and grow morning glory, nasturtium, scarlet runner bean.
- Bulbs: oriental lilies, dwarf dahlias, anemones, crocosmia.
Planting:
Seeds can be planted directly in the container: thoroughly water the soil mix, plant the seeds at the depth indicated on the seed package, place the container in a warm place, and keep the seeds moist. Thin the seedlings to prevent overcrowding. If transplanting, start with shorter, stocky plants that are not yet blooming. Keep the root ball intact and water thoroughly after planting.
Grooming:
Flowers can be encouraged to bloom longer and more profusely if the spent blooms are deadheaded. Vegetables also are encouraged to produce a more abundant crop if the fruits are kept picked as they mature. Inspect the plants for pests and disease; insects can be removed by hand, and remove any infected or dead leaves or flowers for good sanitation.
Overwintering:
Containers that are porous will crack if the soil inside is allowed to freeze and thaw throughout the winter. Often perennials, ornamental grasses, and woody plants are treated as annuals in containers and not overwintered. Containers can be moved to a protected porch or patio where the plants can be watered throughout the winter, or plants can be transplanted into the garden for over wintering. All growing media and annual plants should be composted at the end of the growing season. In the spring, disinfect containers with a 10% solution of chlorine bleach, and start with fresh growing media.
Container gardening is rising in popularity and is nearly becoming an art form. The lack of space does not have to diminish your passion to grow plants of all kinds. Gardens can show up in window boxes, balconies, rooftops and entry-ways. The possibilities are endless and the satisfaction tremendous!
Trough Garden
Today, troughs make a wonderful decorative feature on the patio, terrace, balcony, or in the landscape. However, the problem exists in the scarcity and the expense of the old troughs and sinks. A technique for making artificial stone troughs was developed in the 1980s. This technique uses a mixture of ingredients to make “hypertufa.”
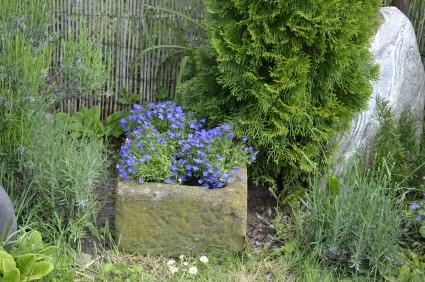 Hypertufa is an artificial medium with absorbent properties similar to tufa rock. Planters and other decorative items, such as bird baths, made from hypertufa resemble carved rock. Hypertufa resembles old stone, but it is lighter and much less expensive than carved rock. Once the hypertufa trough is cured, freezing will not damage it, and it can last for years and years outdoors.
There are many recipes for hypertufa on the internet. Most of them blend fine-grade Portland cement, gritty sand, and sphagnum peat moss. Some include perlite or vermiculite and incorporate chicken wire or fiber for reinforcement. Often times, community colleges or county extension offices will have classes on how to make a hypertufa trough. The public library is also a source of information for making faux-stone planters.
After a trough is either made or purchased, preparing the trough for planting begins with covering the drainage holes with pieces of fiberglass mesh (window screen material). After the screening material is in place, cover the bottom of the trough with ½ inch of pea gravel. Fill the trough with a 1:1:1 ratio of all purpose potting soil, peat moss, and sharp sand or perlite.
The size of the trough limits the size of plants that can be selected. Choose plants that are smaller in size and have a slow growth rate. Select plants that have similar needs for water, drainage and light. Trough gardens will require more fertilizing and watering than plantings that are in the ground. For wintering, the plants may require a mulch to protect from cold temperatures.
Plant selections include:
- Spring bulbs: scilla, snowdrops, crocus, mini-daffodils.
- Annuals: verbena, dusty miller, trailing lobelia, heliotrope, livingstone daisy, sweet alyssum.
- Perennials: saxifrage, sedum, sempervivum, arenaria, lewisia.
- Herbs: prostrate rosemary, thyme, wild pansy.
- Mosses: to enhance moss growth, paint the hypertufa with buttermilk and pulverized moss.
Add a trough-garden to the landscape for some added visual interest and drama to unexpected areas. Let imaginations run, and the trough display can be enjoyed for years to come.
Nature's Garden
- Lovely to look at!
- Less maintenance than lawns or gardens.
- Less input like water and fertilizer.
- Less soil erosion.
- Creates biodiversity which mean fewer pests and less disease.
- Attractive to wildlife.
There are mixtures for every possible setting! Here are a few, for example:
- Regional wildflower mixtures – these species are chosen to perform well in a specific geographic location and the climate conditions within that location.
- Specialty wildflower mixtures – these are species that are chosen for a specific purpose such as low-growing, deer resistant, or partial shade.
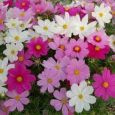
- Color mixtures – these are annual species that are chosen to give a specific color display. All the species in the mix are shades of one color. There are mixes in shades of blue, green, orange, pink, red, yellow, and white.
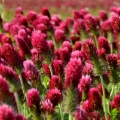
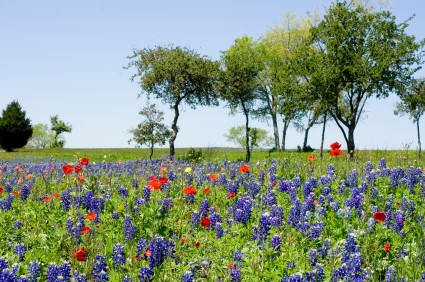
- Individual Species – if a person loves a particular wildflower, like Texas Bluebonnets, or has specifications for color or height, the seed for individual species can be purchased separately.
To have a successful wildflower setting, it’s important to do some research. Just scattering seeds out onto the ground and expecting a lovely display to spring up is not realistic. Nor is it realistic to believe that there is no maintenance involved in a wildflower meadow. Here are some steps that will help to ensure that the lovely vision that is in our mind is more likely to become a reality in our landscape.
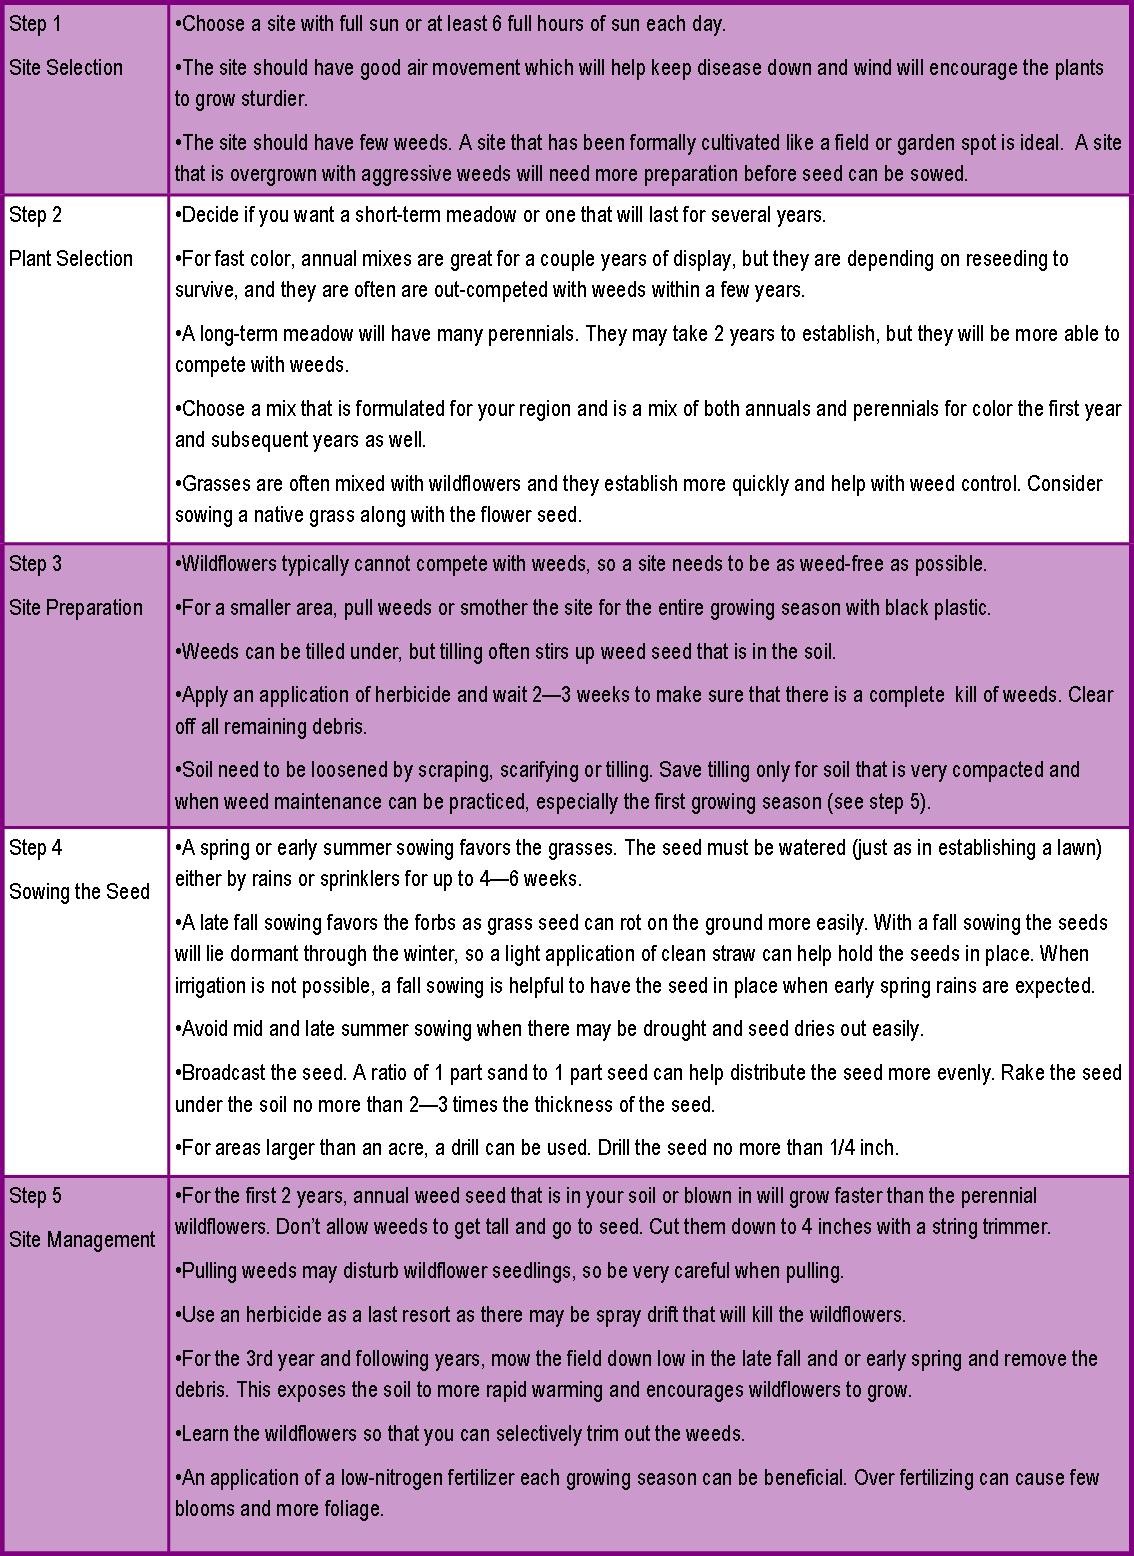
5 Steps to Create a Wildflower Meadow:
This manual is by no means an exhaustive list of gardening styles. There are knot gardens, Japanese gardens, cactus gardens, water gardens, and of course, vegetable gardens, with the list continuing to go on and on! No matter what style garden you choose to integrate into your landscape, it should and will bring you great enjoyment. After you consider the possible challenges of your environment, customize any garden style to be your very own.
By studying different garden styles, you will begin to collect bits of knowledge and creative ideas that will be useful when you create your own unique space. Your garden will begin to reflect your personality, and the time spent working in your own space just might become some of your favorite moments. With time, you may begin to feel captivated by the charms of the garden you have created with your own two hands.
One thing that I have not mentioned is the EFFORT involved in all of these gardening styles! It is impossible to have a lovely display without time, hard work, and sweat. But there is something about sitting down with a tall, cold glass of ice tea after a hard work session in the garden and calmly reflecting on the accomplishments, the beauty, the mystical captivation … and you know, it is worth it all!
“There can be no other occupation like gardening in which, if you were to creep up behind someone at their work, you would find them smiling.” ~Mirabel Osler
Resources Used
http://extension.oregonstate.edu/sorec/sites/default/files/documents/garden_beet_may_2010.pdf
http://aggie-horticulture.tamu.edu/southerngarden/Cottagedesign.html
http://pss.uvm.edu/ppp/articles/engarden.htm
Rock Garden:
http://www.ext.colostate.edu/ptlk/1115.html
http://www.spokane-county.wsu.edu/spokane/eastside/Fact%20Sheets/C121%20Rock%20Garden%20Plants%20for%20the%20INW%20%2005.pdf
http://extension.psu.edu/montgomery/programs/master-gardener/the-learning-gardens/the-rock-garden
http://www.uvm.edu/~pass/perry/oh41.html
http://pss.uvm.edu/ppp/articles/rocks.html
http://www.colostate.edu/Depts/CoopExt/4DMG/Flowers/Annuals/rock.htm
Cutting Garden:
http://pss.uvm.edu/ppp/articles/cutgardn.html
http://web.extension.illinois.edu/state/newsdetail.cfm?NewsID=27616
http://www.extension.iastate.edu/newsrel/2001/jan01/jan0118.html
Herb Garden:
http://extension.usu.edu/files/publications/factsheet/pub__2757969.htm
http://www.coopext.colostate.edu/boulder/horticulture/pdf/Year-Round%20herb%20Garden.pdf
http://extension.psu.edu/franklin/programs/master-gardener/demonstration-gardens/herb-garden
http://byf.unl.edu/Herbs1
http://www.ext.colostate.edu/ptlk/1056.html
http://www.ces.ncsu.edu/hil/hil-8112.html
http://www.wvu.edu/~agexten/hortcult/herbs/ne208hrb.htm
http://www.cals.ncsu.edu/entomology/apiculture/pdfs/1.05%20copy.pdf
http://extension.psu.edu/montgomery/programs/master-gardener/the-learning-gardens/the-herb-garden
Xeriscape Garden:
http://www.colostate.edu/Depts/CoopExt/4DMG/Xeris/xeris1.htm
http://www.ext.colostate.edu/pubs/garden/07228.html
Native Garden:
http://herbarium.biology.colostate.edu/gardening.htm
http://www.ncsu.edu/goingnative/howto/implemen.html
http://extension.psu.edu/lancaster/programs/master-gardener/idea-gardens/the-native-plant-garden-1
Container Garden:
http://pubs.ext.vt.edu/426/426-020/426-020.html
http://urbanext.illinois.edu/containergardening/welcome.cfm
http://www.ext.colostate.edu/pubs/garden/07238.html
http://www.gardening.cornell.edu/factsheets/misc/containers.pdf
Trough Garden:
http://web.extension.illinois.edu/dmp/palette/100207.html
http://whatcom.wsu.edu/ag/homehort/hypertufa.htm
http://coopext.colostate.edu/4DMG/Garden/trough.htm
http://www.ext.colostate.edu/pubs/columngw/gr110723.html
Nature’s Garden:
http://pss.uvm.edu/ppp/pubs/oh84mead.htm
http://ag.arizona.edu/yavapai/anr/hort/byg/archive/wildflowermeadow2013.html
http://www.uri.edu/cels/ceoc/documents/LarryWeaner_wildflowermeadows.pdf